Adding a custom sunroom to your home is an exciting investment, one that enhances your space, boosts property value, and brings the outdoors in without sacrificing comfort. If you’ve never gone through the installation process before, knowing what to expect can help everything go more smoothly. This guide will walk you through each step of the process, from the first design meeting to final walkthrough and warranty support.
The Sunroom Installation Experience: A Step-by-Step Guide
Every custom sunroom begins with a vision. Whether you’re looking for a peaceful retreat, a space to entertain, or simply more natural light in your home, the process starts with translating your ideas into a tailored design.
Initial Consultation and Design Meeting
Your journey begins with a meeting with a Sunspace dealer like 3 Season Solutions. During this session, you’ll discuss your goals, preferences, and budget. The dealer will showcase material options, layout possibilities, and sunroom models suited to your lifestyle and local climate.
Site Assessment and Measurement
After your initial consultation, a technician will visit your home to assess the installation area. They’ll take precise measurements and evaluate conditions like existing structures, terrain, and sun exposure to ensure the perfect fit and function of your new sunroom.
Finalizing Your Custom Options and Layout
Once measurements are taken and your goals are clear, the design team finalizes your sunroom layout. You’ll confirm the model, choose glazing tints, door styles, roof options, and finishes that best match your home’s architecture and your personal style.
Preparing Your Home for Installation
Before construction begins, there are a few important preparatory steps. This phase ensures the project meets local building standards and that your home is ready to welcome its newest addition.
Permits and Local Regulations
Your dealer will guide you through the permitting process, ensuring all local building codes, zoning laws, and regulations are followed. They may also assist with HOA documentation if required.
Preparing the Installation Site
The work area will need to be cleared of furniture, décor, or landscaping that might obstruct access. Your dealer may advise on temporary adjustments like removing railings or trimming shrubs before installation.
Scheduling and Communication with the Dealer
You’ll receive a clear timeline for your sunroom project, including anticipated start dates, milestone check-ins, and estimated completion. Good communication helps prevent delays and keeps everyone informed.
What Happens During the Installation
Installation day is when the transformation begins. Depending on the size and complexity of your sunroom, this phase can span a few days to a couple of weeks.
Day-by-Day Breakdown of the Process
Typically, the first day involves preparing the foundation or attaching the structure to an existing deck. Following days include framing, window and door installation, roofing, and finishing details. Your installer will update you at each stage.
Coordination with Other Trades (Decking, Electrical, etc.)
If your sunroom requires electrical hookups, heating elements, or new decking, your dealer will coordinate with licensed tradespeople to handle these tasks in sync with the build timeline.
Clean-Up, Walkthrough, and Final Adjustments
Once the structure is complete, the team performs a thorough clean-up of the site. A final walkthrough ensures everything meets your expectations, and any last-minute adjustments are handled before project sign-off.
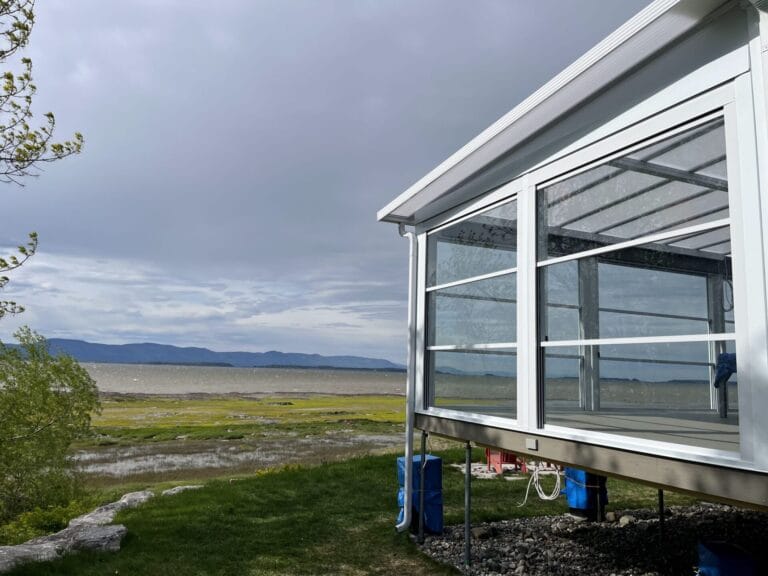
3-Season Solutions: Versatile Comfort for Spring Through Fall
If you’re looking for an affordable and flexible sunroom solution, a 3-season sunroom offers the perfect balance. Designed for use in spring, summer, and fall, these rooms feature durable aluminum framing, View Flex vinyl or tempered glass glazing, and full ventilation to enjoy fresh air without bugs or rain.
With customizable tints, optional sliding doors, and the ability to build over an existing deck or patio, a 3-season sunroom transforms your outdoor space into a stylish, protected retreat: without the cost of a full four-season room. It’s an excellent choice for families who want more room to relax, dine, or entertain without worrying about the weather.
Tips for a Smooth Installation Experience
To get the most from your sunroom installation, a little preparation goes a long way. Here are a few simple tips to make the process even easier.
Communicating Expectations Early
Be clear about your goals and timeline with your dealer from the beginning. Whether you have design priorities or scheduling constraints, sharing early helps avoid surprises.
Ensuring Access to the Work Area
Make sure installers have clear access to the site. This includes unlocking gates, moving vehicles, and notifying neighbors if needed. The easier the access, the faster the job.
What Homeowners Can Do Before and After
Before installation, remove valuables or decorations near the work area. After completion, take time to clean windows, decorate your new space, and review your maintenance guide for seasonal care.
Conclusion
A custom sunroom is more than just an addition to your home: it’s an upgrade to your everyday living. With careful planning, skilled installation, and the right partner by your side, the process is smooth and rewarding from start to finish. Whether you choose a 3-season room or a fully insulated model, working with a certified Sunspace dealer ensures your sunroom is built to last and ready to enjoy.
Start designing your custom sunroom today
Choosing the right custom sunroom can completely transform how you experience your home’s outdoor spaces. With versatile 3-season sunroom solutions, you can relax, entertain, or unwind in comfort from early spring through late fall, protected from the elements and surrounded by natural light. Discover how a custom sunroom can make your outdoor living space a year-round favorite.

