Quick Answer
To convert gazebo into screen room space in North Dakota, measure each opening between the posts, choose WeatherMaster doors and windows sized to fit under your existing roof, then have the pre-squared aluminum units mounted and sealed. The result is a bug-free, weather-protected retreat you can enjoy from spring through fall.
There’s nothing quite like summer at a North Dakota lake cabin, until the mosquitoes show up at dusk. If your gazebo sits empty half the evening because of bugs, wind, or blowing rain, a screen enclosure changes everything. At Sunspace 3 Season Solutions, we help homeowners around Fargo turn open-air structures into comfortable, protected spaces without tearing anything down. This guide walks you through the retrofit, step by step, from measuring your openings to choosing the right glazing tint. By the end, you’ll know exactly what it takes to reclaim your evenings on the water.
Why Convert Gazebo into Screen Room
A gazebo already gives you a roof and a footprint, so the hard part is done. Adding WeatherMaster doors and windows underneath lets you close the space against wind, rain, and insects while keeping the airy feel you love. It’s the fastest way to convert gazebo into screen room living without a full rebuild.
The payoff is real time back outdoors. Instead of retreating inside when the sun drops and the bugs arrive, you stay put for morning coffee, family card games, or a good book while the loons call across the water. That bug-free comfort is what most cabin owners notice first.
There’s a practical side, too. A protected enclosure shields your outdoor furniture from UV fading and sudden storms, and it adds usable square footage that many buyers see as genuine value at resale.
Step 1: Measure Your Gazebo Openings
Every retrofit starts with accurate numbers. Measure the width and height of each bay between your gazebo posts, one at a time. WeatherMaster window systems handle openings up to 192 inches wide in a horizontal four-track configuration, and doors are built in custom sizes from 24 to 42 inches wide and 60 to 96 inches high. Precise figures let us pre-square each unit at the factory.
Next, decide where you’ll walk in and out. Most cabins do well with a single walk-through door on the lake-facing side, with fixed and adjustable window systems filling the remaining bays. Because a gazebo is rarely perfectly square, treat each side as its own project rather than assuming they all match.
Step 2: Choose Your Doors, Windows, and Glazing
This is where a simple bug screen becomes a true three-season room. Our WeatherMaster doors pair a full fiberglass mesh screen with ViewFlex vinyl glazing, so you can open up for 75% ventilation on a breezy afternoon or seal out a cold front in minutes. The stainless steel heavy-duty hinges prevent sagging season after season.
For the surrounding walls, vertical four-track windows stack up, stack down, or bunch in the middle for infinitely adjustable airflow. Prefer a side-to-side glide instead? The horizontal two-to-four-track windows deliver the same flexibility, with 50% ventilation on the two-track and 75% on the four-track.
Both systems use ViewFlex vinyl, which is lighter, safer, and more durable than glass. Pick a frame color from white, driftwood, bronze, black, or gray, then choose a vinyl tint, clear, smoke gray, dark gray, or bronze, to control how much light comes through.
Step 3: Prep for Under Existing Roof Screen Doors
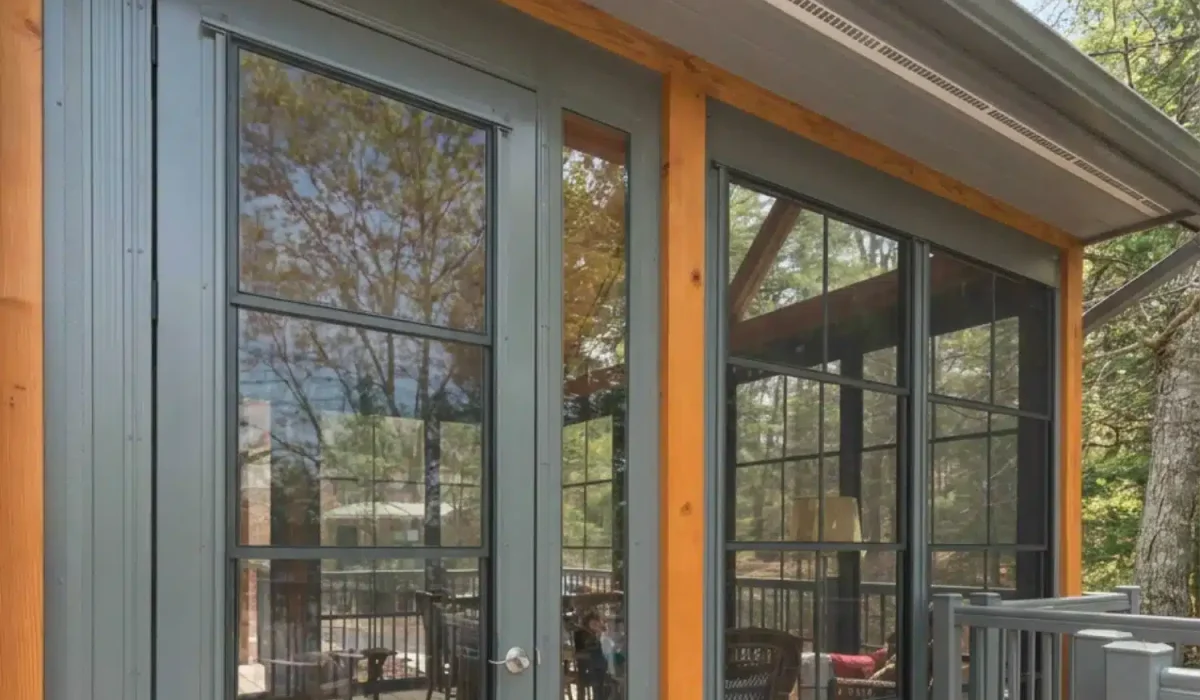
WeatherMaster systems are engineered specifically for under existing roof applications, which is exactly what a gazebo gives you. Since the roof and posts already carry the load, the prep work stays straightforward. We confirm the posts are plumb, add framing or wall units below the windows where needed, and set clean, level openings for the doors.
Pre-installed thresholds come standard with every unit, and a custom kick plate is available at no upcharge if you want a more finished look at the base. This stage is what separates a tidy retrofit existing gazebo screen enclosure from a leaky, rattling afterthought. Get the openings right, and everything above fits like it was always meant to be there.
Step 4: Professional Installation
Because each unit arrives pre-squared, installation moves quickly, yet this is still the step where craftsmanship matters most. Our crews mount the outside-mount frames, integrate the fiber mesh screens, and seal every joint against wind-driven rain. A locking handset comes included, giving you security when the cabin sits empty during the week.
WeatherMaster products carry over 40 years of time-tested durability and are backed by a manufacturer factory warranty. You can learn more about the manufacturer at Sunspace Sunrooms. When our team handles the install, every panel and threshold is tuned for our harsh upper-Midwest weather, so your new space holds up long after the first hard frost.
Common Mistakes to Avoid
The most common misstep is guessing at measurements. A gazebo is rarely perfectly square, and eyeballing a bay leads to gaps that let bugs and drafts sneak in. Measure every opening individually.
Another mistake is treating a three-season space like a heated winter room. These enclosures are wonderful from spring through fall, but they aren’t insulated for a January cold snap in Minnesota or North Dakota. Set your expectations around three-season enjoyment and you’ll love the room every warm month.
Finally, skipping professional installation to save time usually costs more later. Sagging doors, poor sealing, and warranty gaps are all avoidable with an expert install from the start.
FAQ
Can I really retrofit my existing gazebo, or do I need to build new?
In most cases, you can retrofit. If your gazebo has a solid roof and sound posts, it already provides the structure WeatherMaster systems are designed to attach to. We simply enclose the open bays with doors and windows. That’s why these are ideal for under existing roof screen doors, no demolition or new foundation required.
Are WeatherMaster doors good for North Dakota winters?
They’re built for our harsh upper-Midwest weather and provide strong protection from wind, insects, and UV, with better thermal performance than single-pane glass. That said, a three-season enclosure isn’t a heated winter room. For true year-round comfort in deep cold, ask Sunspace 3 Season Solutions about an insulated sunroom instead.
How much ventilation will I actually get?
Quite a lot. A horizontal four-track window opens up to 75% ventilation, and the two-track opens to 50%. The vertical four-track panels are infinitely adjustable, so you can stack them up, down, or bunch them in the middle to catch exactly the breeze you want off the lake.
Does the vinyl glazing need much maintenance?
Very little. ViewFlex vinyl is virtually maintenance free, lightweight, and easy to clean with mild soap and water. It resists yellowing and won’t shatter like glass, which makes it a safer, longer-lasting choice for a busy family cabin where kids and pets are always coming and going.
Conclusion
A retrofit is the smart, affordable way to convert gazebo into screen room comfort, giving you bug-free evenings, UV protection, and adjustable airflow all season long.
With accurate measurements, the right WeatherMaster doors and windows, and clean prep under your existing roof, your open-air structure becomes a true lakefront retreat.
Ready to reclaim your evenings on the water? Reach out to Sunspace 3 Season Solutions for a personalized quote and let us show you what your gazebo can become.